Being a dad is synonymous with being a grill master: no ifs or buts, you have to be handy with raw meat and fiery coals to pass your dad license. This applies to vegans as well! There’s nothing tastier than a nice, char-grilled platter of vegetables for a nice, healthy dinner!
For the rest of us meat eaters, a dad needs to master the art of cooking steak. A nice, thick-cut ribeye cooked to medium-pink perfection with a golden, crusty exterior is one of the epitomes of dad science (along with, you know, being a loving and caring figure to your kids!), and while everyone and their dad’s dad has a sure-fire-this-is-the-way-that-works method, science trumps those all.
According to research by various chefs and actual scientists, the best way to get even, medium-cooked meat with a crusty exterior has to be reverse sear. Reverse sear steaks involve cooking the meat low and slow before blasting it in high heat. If you’re using a grill, this is also a great way to add smoky goodness to your meat. That being said, this works great with an oven and a stovetop as well.
The reverse sear method isn’t just for steaks though: pork, turkey, chicken, and even vegetables benefit from this type of cooking as well. However, it will usually work best with thicker cuts; experts recommend using the reverse sear on cuts of meat (or veg) that are at least half an inch or thicker.
Here is BetaDadBlog’s process of cooking reverse sear steaks so you can impress your family and friends in your next barbecue!
Reverse Sear Steaks: Start with the Low-and-Slow

Reverse seared steaks start with a low and slow method of cooking that allows for the various proteins in the meat to relax slowly. This makes for the juiciest, softest meat possible without overcooking the steak.
If you’re using a grill, start off with your lit coals on only one side of the grill. When you lay down your steaks, make sure they’re far off from the live coals. Ideally, you should put your steaks on a rack above the actual grill or have a smoking stone in between the steak and the grill. Either way, just make sure your steaks are not in direct contact with your heat source. At this point, you can add your smoking woods like hickory or maple. Cover and let it get up to temp before adding your steaks and covering it again, making sure to maintain a steady temperature.
For ovens, start off with a pre-heated oven and make sure your steak is elevated from the cooking vessel. We recommend using a wire rack set on top of a cast-iron pan as this allows the steak’s natural juices and fat to render into the pan, and also pre-heating your cast-iron so it’s easier to sear later. Also, use a cast-iron pan, it’s scientifically proven to make better steaks.
With either method, keep your temperature in and around 200 degrees F (or 93c for our neighbors up north). Depending on the thickness of your steak, keep them in your grill or oven for around 30-45 minutes.
Pro-tip: for the best results, do not go by time; instead, have a meat thermometer on hand as these will give you the most accurate readings possible. Aim for an internal temp of 115-120F for a medium-rare steak, as the meat will cook slightly during the searing process to bring it up to a perfect medium.
Reverse Sear Steaks: After the Low-and-Slow, Go for High-and-Fast

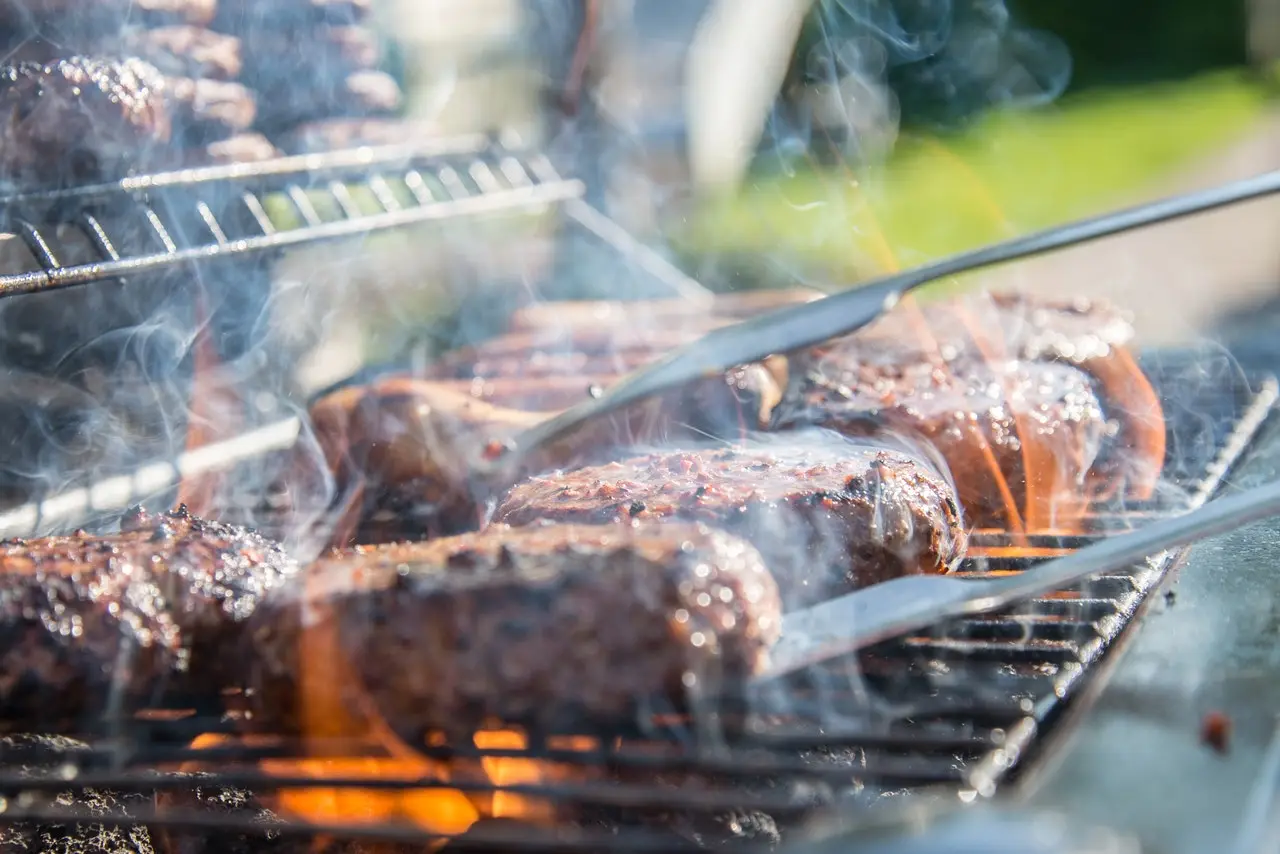
Once your meat has gotten to the right internal temperature, blast them in as high a heat as possible.
For the grill, take out your steaks and set them aside while you get your grill up to temp. Shoot for 600F by getting as much oxygen to your coals as possible, add more live coals using a chimney if necessary. Spread the coals around so the entire bottom of the grill is now churning out as much heat as possible. Then, slap your steaks back onto the hot grill and sear them on both sides until they reach an internal temp of 130-135F.
For the oven, take your steak and wire rack off and set aside. Place your cast-iron pan on high heat and place your steak back onto it. Sear on both sides until they reach an internal temp of 130-135F. To elevate your steak to haute cuisine, add a knob of butter, 1 or 2 crushed whole cloves of garlic, and a sprig of rosemary to the hot fat. Baste the meat while you create your crust. This will impart subtle garlicky and herby flavors to your steak that will leave your diners wanting more.
Pro-tip: when it comes to flipping meat, there are two schools of thought: the traditional way involves laying your meat onto your direct heat source and leave it, without flipping, for a minute or so to develop a crust. The other school of thought says to flip your meat frequently, around 1 flip every 30 seconds, so that both sides get an even amount of heat, resulting in a more even crust.
The frequent-flip school is the one supported by science: Heston Blumenthal, one of the U.K.’s premier chefs/food scientist, proved this by having a thermal imaging camera show the external temp of a steak using both methods. He found that the traditional way of cooking steaks actually results in a drastic drop of temperature in the unseared side of the steak, which increases the risk of overcooking the meat in the long run. Meanwhile, constantly flipping the steak actually results in much more even heat and crust throughout.
Sorry, traditional dads, you can’t argue with science!
Reverse Sear Steaks: Don’t Even Bother Resting

This is one of the controversial things about reverse seared steaks: some proponents say to rest the meat for 10-15 minutes, while another camp says it’s unnecessary. Here at BetaDadBlog, we say: don’t bother resting.
Here’s the thing about resting meat: when you cook steaks or other proteins using a traditional cooking method that involves cooking it directly on high-heat from the get-go, you need to rest the meat so that the insides can continue cooking from the residual heat. This resting period also allows for the proteins in the meat to relax and allow for the juices, which were boiling and agitating and moving around inside the meat at this point, to re-distribute themselves. Cutting or slicing into the meat without resting will arrest the cooking process and make those juices to run into your cutting board, which is not ideal.
But when you do the reverse sear, the resting period is already finished: that entire time that your cooking the meat low and slow has already dispersed the juices throughout the steak, with the searing process being quick enough to create a beautiful crust but not agitate the juices within. However, some people still rest the meat just to be safe. While we personally don’t think there’s anything wrong with that, we’ve tested the no-rest method multiple times and found that meats that went through 10-minute resting times and no resting times yielded the same result. So, if you’re hungry, hey go for it.
We understand that a lot of these go against traditional grill knowledge, and while other dads might read this and go “well we’ve been doing X for so long and it’s always yielded great results!”, there’s just no competition between anecdotal evidence and food science that’s backed by actual research and facts. Save your next barbecue from disaster and reverse sear your steaks!